git基础-(7)-使用SSH登录github仓库

一、新建 SSH 的密钥

运行命令生成.ssh 密钥目录
$ ssh-keygen -t rsa -C [email protected]

打开用户根目录的 .ssh文件夹,查找里面的公钥文件:选中并复制

二、 SSH 的密钥

打开github账号的setting设置,找到  SSH and GPG keys 并将 步骤一中的 公钥信息,复制到 SSH keys 栏目中。

三、获取SSH连接

1、在仓库的下载中,Clone or download–>Use SSH–> Clone with SSH 获得项目仓库的 SSH链接。

2、在本地客户端中,添加远程仓库的SSH连接别名:

cooldeMacBook-Pro:git-learn cool$ git remote add origin_ssh [email protected]:sky123/huashan.git

3、执行提交到远程库操作

cooldeMacBook-Pro:git-learn cool$ git push origin_ssh master
Enumerating objects: 13, done.
Counting objects: 100% (13/13), done.
Delta compression using up to 4 threads
Compressing objects: 100% (9/9), done.
Writing objects: 100% (9/9), 848 bytes | 848.00 KiB/s, done.
Total 9 (delta 3), reused 0 (delta 0)
remote: Resolving deltas: 100% (3/3), completed with 1 local object.
To github.com:sky123/huashan.git
   e416c03..a4fe921  master -> master
cooldeMacBook-Pro:git-learn cool$ 


git基础-(5)-远程团队内部协作

一、主力开发登录github创建项目仓库

参考图片:
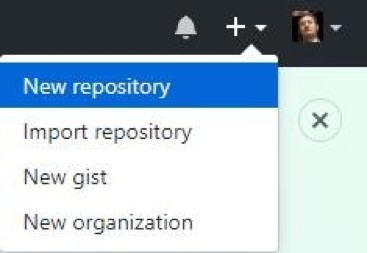
创建完后,拷贝仓库地址 比如 https://github.com/sky123/huashan.git

二、主力开发将本地库提交到github远程仓库

1、设置远程仓库别名

git remote -v 查看当前所有远程地址别名
git remote add [别名] [远程库地址]
git remote add rr https://github.com/i12dream/huashan.git
【rr 是 远程仓库 自己取的 别名,以后还是取 origin 好,这样方便统一】

cooldeMacBook-Pro:git-learn cool$ git remote add rr https://github.com/sky123/huashan.git
cooldeMacBook-Pro:git-learn cool$ git remote -v
rr https://github.com/sky123/huashan.git (fetch)
rr https://github.com/sky123/huashan.git (push)
cooldeMacBook-Pro:git-learn cool$

2、将本地库上传到远程服务器

git push [远程库地址别名] [远程库分支名]

### 上传做法:osx 有弹窗 获取密码,我拒绝了 然后就在 命令行 输入了用户名和密码
cooldeMacBook-Pro:git-learn cool$ git push rr master
Username for 'https://github.com': sky123
Password for 'https://[email protected]': 
Enumerating objects: 4, done.
Counting objects: 100% (4/4), done.
Delta compression using up to 4 threads
Compressing objects: 100% (4/4), done.
Writing objects: 100% (4/4), 471 bytes | 471.00 KiB/s, done.
Total 4 (delta 0), reused 0 (delta 0)
remote: 
remote: Create a pull request for 'master' on GitHub by visiting:
remote:      https://github.com/sky123/huashan/pull/new/master
remote: 
To https://github.com/sky123/huashan.git
 * [new branch]      master -> master
cooldeMacBook-Pro:git-learn cool$ 

三、协作开发下载修改并提交到远程

1、协作开发先clone到本地

git clone [远程库地址]   作用:
1、完整的把远程库下载到本地
2、创建origin 远程地址别名
3、初始化本地库

新建一个目录,直接 git clone 就好了。git clone 会新建一个 仓库名文件夹,里面项目已经下载好了,git已经初始化好了 ,远程地址别名也设置好了。
特别注意:远程库 别名这里是 origin 【所以下次都用orign 当做远程库别名好了】

cooldeMacBook-Pro:desktop cool$ git clone
...
..

### 特别注意:远程库 别名这里居然是 origin 【所以下次都用orign 当做远程库别名好了】
cooldeMacBook-Pro:huashan cool$ git remote -v
origin	https://github.com/sky123/huashan.git (fetch)
origin	https://github.com/sky123/huashan.git (push)
cooldeMacBook-Pro:huashan cool$

2、修改了一些文件后,就先提交到本地库

3、提交到远程库的一些问题

当协作开发直接 推送到远程库时,发现 新创建的用户 需要邮箱验证一下。

cooldeMacBook-Pro:huashan cool$ git push origin master
Username for 'https://github.com': skyman
Password for 'https://[email protected]': 
remote: You must verify your email address.
remote: See https://github.com/settings/emails.
fatal: unable to access 'https://github.com/sky123/huashan.git/': The requested URL returned error: 403
cooldeMacBook-Pro:huashan cool$

登录邮箱验证完后,再一次推送提交,发现无法授权 ,需要仓库创建者【主力开发】的邀请。

邀请怎么添加呢?
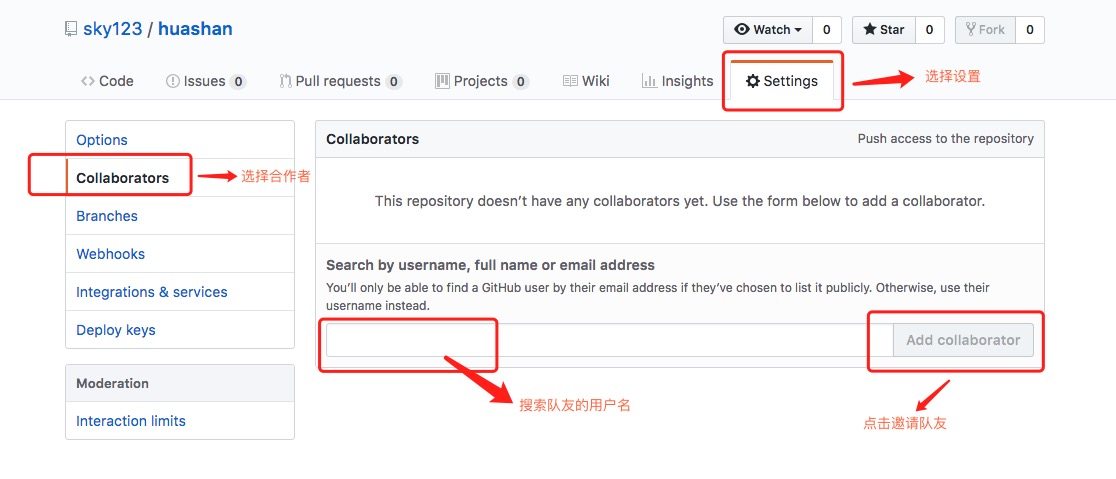

“主力开发”通过各种方式把邀请链接发送给“协作开发”,“协作开发”登录自己的 GitHub账号,访问邀请链接。

成为合作者后,协作开发就能提交到远程仓库了。
cooldeMacBook-Pro:huashan cool$ git push origin master

四、主力开发从远程仓库拉取并合并到本地

 pull=fetch+merge
 git fetch [远程库地址别名] [远程分支名]
 git merge [远程库地址别名/远程分支名]
 git pull [远程库地址别名] [远程分支名]

1、可以使用 fetch 和 merge  两步操作

远程仓库管理者【主力开发】 :拉取远程已经修改的仓库。rr 是 之前远程仓库地址的别名。

cooldeMacBook-Pro:git-learn cool$ git remote -v
rr	https://github.com/sky123/huashan.git (fetch)
rr	https://github.com/sky123/huashan.git (push)

cooldeMacBook-Pro:git-learn cool$ git fetch rr master
remote: Enumerating objects: 7, done.
remote: Counting objects: 100% (7/7), done.
remote: Compressing objects: 100% (2/2), done.
remote: Total 4 (delta 2), reused 4 (delta 2), pack-reused 0
Unpacking objects: 100% (4/4), done.
From https://github.com/sky123/huashan
 * branch            master     -> FETCH_HEAD
   4a234e2..97806e9  master     -> rr/master
cooldeMacBook-Pro:git-learn cool$ 

下载到本地的目录是 rr/master ,也就是说本地有 master  rr/master 两个分支。

cooldeMacBook-Pro:git-learn cool$ git checkout rr/master
Note: checking out 'rr/master'.

You are in 'detached HEAD' state. You can look around, make experimental
changes and commit them, and you can discard any commits you make in this
state without impacting any branches by performing another checkout.

If you want to create a new branch to retain commits you create, you may
do so (now or later) by using -b with the checkout command again. Example:

  git checkout -b <new-branch-name>

HEAD is now at 97806e9 令狐冲
cooldeMacBook-Pro:git-learn cool$

接下来就是合并操作了:【如果合并时出现冲突,可以根据分支冲突一文来处理】
cooldeMacBook-Pro:git-learn cool$ git merge rr/master

2、也可以使用 pull 操作 一步到位

pull 等于 fetch + merge
cooldeMacBook-Pro:git-learn cool$ git pull rr master

五、主力开发和协作开发同时提交到远程问题

两个开发者 同时向 远程库 提交的情况下:第二个 开发者 提交时 会报错 。

cooldeMacBook-Pro:huashan cool$ git push origin master
Username for 'https://github.com': skyman
Password for 'https://[email protected]': 
To https://github.com/sky123/huashan.git
 ! [rejected]        master -> master (fetch first)
error: failed to push some refs to 'https://github.com/sky123/huashan.git'
hint: Updates were rejected because the remote contains work that you do
hint: not have locally. This is usually caused by another repository pushing
hint: to the same ref. You may want to first integrate the remote changes
hint: (e.g., 'git pull ...') before pushing again.
hint: See the 'Note about fast-forwards' in 'git push --help' for details.
cooldeMacBook-Pro:huashan cool$ 

我们需要从远程库中将最新的版本下载下来,先合并 然后再提交!!!

cooldeMacBook-Pro:huashan cool$ git pull origin master
From https://github.com/sky123/huashan
 * branch            master     -> FETCH_HEAD
Auto-merging apple.txt
CONFLICT (content): Merge conflict in apple.txt
Automatic merge failed; fix conflicts and then commit the result.
cooldeMacBook-Pro:huashan cool$ vim apple.txt
cooldeMacBook-Pro:huashan cool$ git add apple.txt
cooldeMacBook-Pro:huashan cool$ git commit -m "conflict resolve"
[master e416c03] conflict resolve
cooldeMacBook-Pro:huashan cool$ git push origin master
Username for 'https://github.com': skyman
Password for 'https://[email protected]': 
Enumerating objects: 10, done.
Counting objects: 100% (10/10), done.
Delta compression using up to 4 threads
Compressing objects: 100% (6/6), done.
Writing objects: 100% (6/6), 687 bytes | 687.00 KiB/s, done.
Total 6 (delta 1), reused 0 (delta 0)
remote: Resolving deltas: 100% (1/1), done.
To https://github.com/sky123/huashan.git
   ff6f1a1..e416c03  master -> master
cooldeMacBook-Pro:huashan cool$ 

 

git基础-(4)-分支管理合并与冲突

一、创建分支

git branch [分支名]

创建出来的分支和原分支是一模一样的,里面的内容都没有变。注意创建出来的分支不是空分支。

二、查看所有分支

git branch -v

三、切换分支

git checkout [分支名]

四、删除分支

git branch -d [分支名]

五、合并分支内容

 当前分支合并被合并分支:  git merge [被合并分支]

核心总结:如果两个分支合并时,产生了新节点【判断是否产生新节点的依据是,A和B合并时,是否之前已经出现了合并结果了】,就会需要-m 参数 来 添加 提交备注,否则不需要  -m 参数 来 添加提交备注。

不存在行冲突时:git 分支合并是以 作为单位的,不存在行冲突就自动合并了。
如果 A和B一开始是一模一样的,A修改了提交生成 A+。
此时 A+ merge B,结果是没有变化,仍是 A+。
如果接着 B merge A+,则 B变成了A+ ,且没有产生新节点,不需要添加提交信息。

如果 A和B一开始是一模一样的,A修改了提交生成 A+,且 B修改成了B+。
此时 A+ merge B+,生成 A++,需要添加提交备注,也可以直接输入 A+ merge B+ -m "XX"
如果接着 B+ merge A++,则B+ 变成了 A++,且没有产生新节点,不需要添加提交信息。

存在行冲突时:在同一行 合并和被合并分支 都修改过了。

1、AB合并之前已经有合并结果了,比如A分支合并了B分支,产生了A+节点,此时B分支再合并A分支时,也只会变成A+节点。

2、AB合并之前还未出现合并结果,此时需要将所有冲突文件都添加到暂存区,然后提交(这里的 git commit 不需要再写文件名了,但是提交备注还是需要的)产生新的合并后节点。

aaaaaaa
bbbbbbb
ccccccc   ### modify by master
ddddddd
eeeeeee
fffffff

git commit apple.txt -m "modify apple by master"

===========上面是主分支进行的修改提交====下面是被合并分支进行的修改提交===========

aaaaaaa
bbbbbbb
cccccc  ### modify by hot_fixc
ddddddd
eeeeeee
fffffff

git commit apple.txt -m "modify apple by hot_fix"

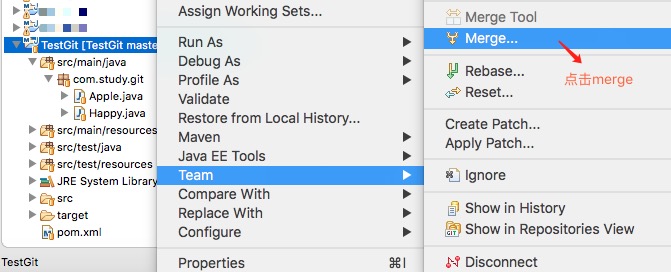
结果显示:存在冲突。

cooldeMacBook-Pro:git-learn cool$ git merge hot_fix
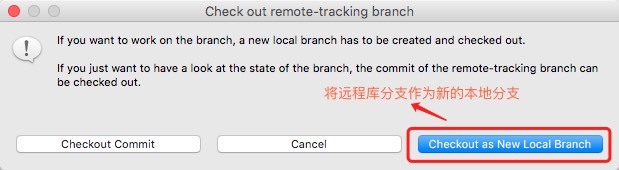
Auto-merging apple.txt
CONFLICT (content): Merge conflict in apple.txt
Automatic merge failed; fix conflicts and then commit the result.
cooldeMacBook-Pro:git-learn cool$ git branch -v
  hot_fix f411b30 modify apple by hot_fix
* master  44bc206 modify apple by master
cooldeMacBook-Pro:git-learn cool$
查看当前合并冲突的状态信息:

cooldeMacBook-Pro:git-learn cool$ git status
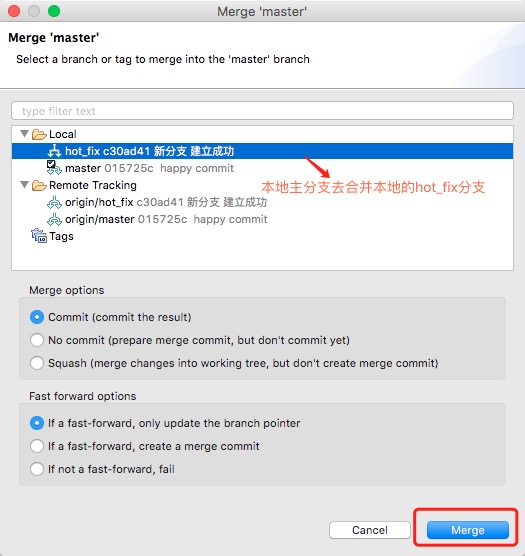
On branch master
You have unmerged paths.
  (fix conflicts and run "git commit")
  (use "git merge --abort" to abort the merge)

Unmerged paths:
  (use "git add <file>..." to mark resolution)

	both modified:   apple.txt

no changes added to commit (use "git add" and/or "git commit -a")
cooldeMacBook-Pro:git-learn cool$ 
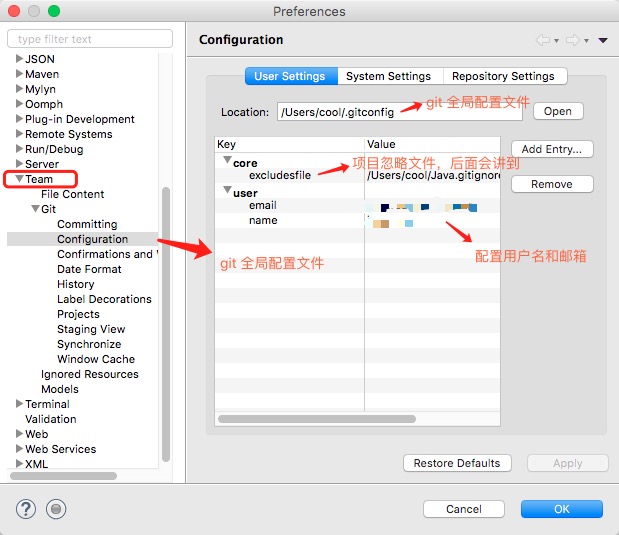
需要手动修改提交:下面就是 冲突文件的信息,需要自己修改。

aaaaaaa
bbbbbbb
<<<<<<< HEAD
ccccccc   ### modify by master
=======
cccccc  ### modify by hot_fixc
>>>>>>> hot_fix
ddddddd
eeeeeee
fffffff

合并冲突时需要修改所有有冲突的文件,然后对每一个冲突文件执行  git add [冲突文件名]  ,当所有冲突文件都添加到暂存区后,执行  git commit -m “日志信息”
注意:此时commit 一定不能带具体文件名。

如果想直接git commit -m "信息" 就会报错了。

cooldeMacBook-Pro:git-learn cool$ git commit -m "测试一下"
U	apple.txt
error: Committing is not possible because you have unmerged files.
hint: Fix them up in the work tree, and then use 'git add/rm <file>'
hint: as appropriate to mark resolution and make a commit.
fatal: Exiting because of an unresolved conflict.
cooldeMacBook-Pro:git-learn cool$ 
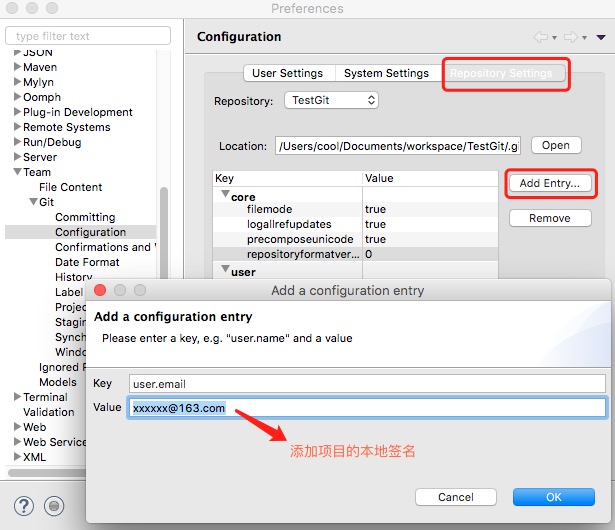
所以必需要先将冲突文件 添加到 暂存区,然后再执行 git commit -m “xxx”【后面不加 -m 参数时,需要进入 vim 编辑 添加提交信息】


下面是修改好,合并到本地库的文件。

aaaaaaa
bbbbbbb
<<<<<<<
ccccccc   ### modify by master
=======
cccccc  ### modify by hot_fixc
>>>>>>>
ddddddd
eeeeeee
fffffff

[注意master合并了hot_fix后,master 现在已经提交了合并,生成了新节点,此时再合并 hot_fix 会提示 已经合并过了,不能合并]

而此时,hot_fix 还是 :

aaaaaaa
bbbbbbb
cccccc  ### modify by hot_fixc
ddddddd
eeeeeee
fffffff

转到 hot_fix 分支, git merge master ,是可以合并的,如下结果

cooldeMacBook-Pro:git-learn cool$ git merge master
Updating f411b30..2faa553
Fast-forward
 apple.txt | 4 ++++
 1 file changed, 4 insertions(+)
cooldeMacBook-Pro:git-learn cool$ vim apple.txt

显示合并后的文件信息

aaaaaaa
bbbbbbb
<<<<<<<
ccccccc   ### modify by master
=======
cccccc  ### modify by hot_fixc
>>>>>>>
ddddddd
eeeeeee
fffffff


mac软件问题和优化-旧版sublime的插件包下载失败

github 最近禁用了 tls1.0 加密协议,而此时mac系统上,旧版sublime,下载时会出现报错。查看sublime控制台报错信息:

Package info was unavailable last time crawler ran. Error downloading repository. HTTP exception InvalidCertificateException (Host api.github.com returned an invalid certificate ([SSL: TLSV1_ALERT_PROTOCOL_VERSION] tlsv1 alert protocol version (_ssl.c:548))) downloading https://api.github.com/repos/rust-lang/sublime-rust.

然后查到:github 的问题贴

简单来说就是,mac版 sublime 用的下载模块是 urllib ,而urllib 是python自带的标准库,里面有ssl模块。而旧版python的ssl模块,采用ssl1.0连接服务器,所以导致高版本的ssl服务器拒绝连接。

解决办法是:打开sublime的
preferences->Package settings->Package control->Settings – User
添加如下代码:【也就是知道下载模块的第一优先级是使用 crul 模块】

"downloader_precedence":
	{
		"osx":
		[
			"curl",
			"urllib",
			"wget"
		]
	},

urllib是Python自带的标准库,无需安装,直接可以用。
提供了如下功能:

  • 网页请求
  • 响应获取
  • 代理和cookie设置
  • 异常处理
  • URL解析

爬虫所需要的功能,基本上在urllib中都能找到,学习这个标准库,可以更加深入的理解后面更加便利的requests库。

python 2.7  代码使用如下:

# request:GET
import urllib
response = urllib.urlopen('http://www.baidu.com')
print(response.read().decode('utf-8'))

英文问题讨论解析:


The problem is that the crawler is running on an old OS and Python 3.3, which doesn’t support TLS 1.2. wbond is already on it.

=====================================================

Python 3.3’s _ssl module uses the OpenSSL API in such a way that a connection to a TLS 1.2 server is not possible. It doesn’t use the TLS 1.1 or TLS 1.2 constants, but rather a constant for TLS 1.0. This results in GitHub rejecting the connection since it uses an insecure version of the TLS protocol.

Windows users by default use the WinInetDownloader, which uses the wininet library, and Microsoft’s TLS stack, so as long as they are running a recent build of Windows, they will have TLS 1.2.

Mac and Linux users default to using urllib, which utilizes the Python _ssl module.

mac系统问题和优化-openssl的更新问题

因为mac 现在主要用 LibreSSL,openssl的更新没有及时。

如果需要更新,可以用brew来安装 openssl,并将其设置为 系统默认的openssl。

cooldeMacBook-Pro:~ cool$ brew install openssl
Updating Homebrew...
==> Downloading https://homebrew.bintray.com/bottles/openssl-1.0.2p.el_capitan.bottle.tar.
######################################################################## 100.0%
==> Pouring openssl-1.0.2p.el_capitan.bottle.tar.gz
==> Caveats
A CA file has been bootstrapped using certificates from the SystemRoots
keychain. To add additional certificates (e.g. the certificates added in
the System keychain), place .pem files in
  /usr/local/etc/openssl/certs

and run
  /usr/local/opt/openssl/bin/c_rehash

openssl is keg-only, which means it was not symlinked into /usr/local,
because Apple has deprecated use of OpenSSL in favor of its own TLS and crypto libraries.

If you need to have openssl first in your PATH run:
  echo 'export PATH="/usr/local/opt/openssl/bin:$PATH"' >> ~/.bash_profile

For compilers to find openssl you may need to set:
  export LDFLAGS="-L/usr/local/opt/openssl/lib"
  export CPPFLAGS="-I/usr/local/opt/openssl/include"

==> Summary
?  /usr/local/Cellar/openssl/1.0.2p: 1,793 files, 12.2MB
cooldeMacBook-Pro:~ cool$ openssl version
OpenSSL 0.9.8zh 14 Jan 2016
cooldeMacBook-Pro:~ cool$ 

调用方法一:更新系统环境变量:

cooldeMacBook-Pro:~ cool$ echo 'export PATH="/usr/local/opt/openssl/bin:$PATH"' >> ~/.bash_profile
cooldeMacBook-Pro:~ cool$ source  ~/.bash_profile
cooldeMacBook-Pro:~ cool$ openssl version
OpenSSL 1.0.2p  14 Aug 2018

调用方法二:

1、删除了.bash_profile中 的用户配置路径 openssl,
2、找到系统 /usr/bin/openssl 重命名乱连接,做备份 /usr/bin/openssl.bak
3、查看 新版openssl的安装目录:

cooldeMacBook-Pro:~ cool$ ls -l /usr/local/opt/openssl
lrwxr-xr-x  1 cool  admin  24 Oct 29 21:06 /usr/local/opt/openssl -> ../Cellar/openssl/1.0.2p

4、备份原来的/usr/bin/openssl,并重新设置系统openssl的软连接:

cooldeMacBook-Pro:~ cool$ sudo ln -s  /usr/local/Cellar/openssl/1.0.2p/bin/openssl  /usr/bin/openssl 
Password:
cooldeMacBook-Pro:~ cool$

关于python中的 ssl版本问题:

urllib是Python自带的标准库,无需安装,直接可以用。而urllib 是python自带的标准库,里面有ssl模块。也就是说python自带的的ssl模块与系统的openssl软件是无关的,版本号当然可以不相同。

cooldeMacBook-Pro:~ cool$ python -c "import ssl; print(ssl.OPENSSL_VERSION)"
OpenSSL 0.9.8zh 14 Jan 2016
cooldeMacBook-Pro:~ cool$ python
Python 2.7.10 (default, Oct 23 2015, 19:19:21) 
[GCC 4.2.1 Compatible Apple LLVM 7.0.0 (clang-700.0.59.5)] on darwin
Type "help", "copyright", "credits" or "license" for more information.
>>> import ssl
>>> ssl.OPENSSL_VERSION
'OpenSSL 0.9.8zh 14 Jan 2016'
>>>

所以使用 旧版本的 urllib 库的 爬虫只支持ssl 1.0协议,导致ssl高版本协议的服务器拒绝与其连接。

HTTP exception InvalidCertificateException (Host codeload.github.com returned an invalid certificate ([SSL: TLSV1_ALERT_PROTOCOL_VERSION] tlsv1 alert protocol version (_ssl.c:548))) downloading https://codeload.github.com/seanliang/ConvertToUTF8/zip/1.2.11.

git基础-(3)-文件比较之diff命令

diff命令都是以行作为比较单位的,如果在某行添加了信息,文件差异比较相当于删除了这行,然后又在此处重新添加了一行。

比较文件差异:
git diff [文件名]
将工作区中的文件和暂存区进行比较

git diff [本地库中历史版本] [文件名]   比如:  git diff head bbb.txt
将工作区中的文件和本地库历史记录比较

不带文件名可以比较多个文件


一、添加了两个新文件并提交到本地库

cooldeMacBook-Pro:git-learn cool$ git commit a.txt bbb.txt -m "两个新文件"
[master ee9a560] 两个新文件
 2 files changed, 11 insertions(+)
 create mode 100644 a.txt
 create mode 100644 bbb.txt
cooldeMacBook-Pro:git-learn cool$ git status
On branch master
nothing to commit, working tree clean
cooldeMacBook-Pro:git-learn cool$ 

接着工作区修改了a.txt ,但是还没有添加到暂存区

cooldeMacBook-Pro:git-learn cool$ git status
On branch master
Changes not staged for commit:
  (use "git add <file>..." to update what will be committed)
  (use "git checkout -- <file>..." to discard changes in working directory)

	modified:   a.txt

no changes added to commit (use "git add" and/or "git commit -a")
cooldeMacBook-Pro:git-learn cool$ 

二、工作区与暂存区比较

采用了diff 命令:

cooldeMacBook-Pro:git-learn cool$ git diff a.txt
diff --git a/a.txt b/a.txt
index 07b3c9e..f9bbd73 100644
--- a/a.txt
+++ b/a.txt
@@ -1,6 +1,6 @@
 sd
 asdsad
-dfsdf
+dfsdf   ##这一行末尾添加了信息 
 
 asd
 soft commit
cooldeMacBook-Pro:git-learn cool$

三、工作区与本地库比较

当前工作区 修改了 a.txt ,没有修改 bbb.txt

1、比较a.txt

cooldeMacBook-Pro:git-learn cool$ git diff head a.txt
diff --git a/a.txt b/a.txt
index 07b3c9e..f9bbd73 100644
--- a/a.txt
+++ b/a.txt
@@ -1,6 +1,6 @@
 sd
 asdsad
-dfsdf
+dfsdf   ##这一行末尾添加了信息 
 
 asd
 soft commit

============上面是工作区与当前游标本地库比较===================

============下面是工作区与上一个游标本地库比较===================

cooldeMacBook-Pro:git-learn cool$ git diff head^ a.txt
diff --git a/a.txt b/a.txt
new file mode 100644
index 0000000..f9bbd73
--- /dev/null
+++ b/a.txt
@@ -0,0 +1,7 @@
+sd
+asdsad
+dfsdf   ##这一行末尾添加了信息 
+
+asd
+soft commit
+
cooldeMacBook-Pro:git-learn cool$ 

 2、比较b.txt

cooldeMacBook-Pro:git-learn cool$ git diff head bbb.txt
cooldeMacBook-Pro:git-learn cool$ 

####  git diff head bbb.txt 当前本地仓库的当前游标下的  bbb.txt 与工作区的 bbb.txt 文件差异比较

==========================
cooldeMacBook-Pro:git-learn cool$ git diff head~1 bbb.txt
diff --git a/bbb.txt b/bbb.txt
new file mode 100644
index 0000000..221c50e
--- /dev/null
+++ b/bbb.txt
@@ -0,0 +1,4 @@
+bob
+sd
+主线程
+主线程
cooldeMacBook-Pro:git-learn cool$ 

==========================
git diff head~1 bbb.txt 代表当前游标的上一个版本的  bbb.txt 与工作区的bbb.txt 差异比较


mac软件问题和优化-自定义terminal主题

一、添加terminal新主题

在这篇博客中,我将把Solarized-Dark主题添加到我们的终端。下载好*.terminal然后直接用终端terminal打开就算主题安装好了。在终端的菜单属性栏可以指定主题。

Note: You can download various Themes (.terminal files) from this git repo. Simply open the *.terminal file to install it, i.e. right-click on the *.terminal file > “open with" > Terminal

  1. Go to http://ethanschoonover.com/solarized
  2. Scroll down and download the Theme (solarized.zip)
  3. Extract the solarized.zip file
  4. Open the osx-terminal.app-colors-solarized folder. This folder contains Theme for the terminal.
  5. Double click “Solarized Dark ansi.terminal” file — This is the specific Theme file for Terminal.app. Note: If you get a warning that this is from an unidentified developer, Right-click on the file and select “Open with” > Terminal option.
  6. At this point, you have the Theme installed into your Terminal. We just need to make it a default Theme.
  7. Open Terminal > Preferences > Text and select the “Solarized Dark …” theme and click on “Default”.

二、安装  Powerline

Powerline是一个Python应用程序,是vim的状态行插件,为几个其他应用程序提供状态行和提示,包括zsh,bash,tmux,IPython,Awesome和Qtile。

1、安装Python【mac系统默认已经安装好了】

通过python -V在终端中输入确保Python的版本是2.7.x.

  • 如果它不是2.7,请安装Homebrew,允许我们通过运行以下命令从CLI安装各种软件:/usr/bin/ruby -e "$(curl -fsSL https://raw.githubusercontent.com/Homebrew/install/master/install)"
  • 运行brew install python以通过Homebrew安装最新的Python

2、安装pip – Python的包管理器(类似于npm)

通过运行$ sudo easy_install pip  来安装pip。
出现ssl下载错误的话,可以用下面的方法安装pip:
根据网站https://pip.readthedocs.io/en/stable/installing/  提示:
curl https://bootstrap.pypa.io/get-pip.py -o get-pip.py
sudo python get-pip.py

3、安装 command line developer tools

从App Store上下载Xcode后,默认是不会安装Command Line Tools的。Command Line Tools是Xcode中的一款工具,可以在命令行中运行C程序,同时又为其他软件提供操作系统服务的功能。

Command Line Tools【又叫 XCode Developer CLI tools】are used by Powerline and other apps that manipulate core OSX features. So make sure to install the XCode CLI tools by running the following command.

现在也来学习一下如何安装Command Line Tools:

方法一:Terminal 运行 xcode-select --install 然后点击安装
方法二:登录https://developer.apple.com/download/more/ 然后下载 dmg 安装
坑爹提醒: 网上复制粘贴这个 xcode-select —-install 到终端出现报错,仔细一看命令行居然是  – 和— 两个不同的破折号。

检验是否安装完成:

cooldeMacBook-Pro:~ cool$ xcode-select --install
xcode-select: error: command line tools are already installed, use "Software Update" to install updates

或者:在xcode 中创建 OSX 的Application 项目时有 command line tool 选项。

4、安装Powerline

$ pip install --user powerline-status

添加powerline 后台进程 到bash,用于监控终端并及时作出响应。
(1)pip show powerline-status知道powerline安装目录。
(2)修改环境变量:

export PATH=$PATH:$HOME/Library/Python/2.7/bin
powerline-daemon -q
POWERLINE_BASH_CONTINUATION=1
POWERLINE_BASH_SELECT=1
. /Users/rupa/Library/Python/2.7/lib/python/site-packages/powerline/bindings/bash/powerline.sh

(3)生效环境变量
source ~/.bash_profile

三、 Powerline 与 本地化问题

打开终端后发现:

 File "/System/Library/Frameworks/Python.framework/Versions/2.7/lib/python2.7/locale.py", line 475, in _parse_localename
    raise ValueError, 'unknown locale: %s' % localename
ValueError: unknown locale: UTF-8

查看问题 ‘unknown locale: %s’ % localename
解决办法是:在 .bash_profile 调用powerline之前就先添加上 本地化变量:
export LC_ALL=en_US.UTF-8
export LANG=en_US.UTF-8

我的 .bash_profile 最终配置如下:

### 下面设置的本地化变量  是为了解决powerline 本地化报错问题,变量一定要在powerline运行前调用 
export LC_ALL=en_US.UTF-8
export LANG=en_US.UTF-8

export PATH=$PATH:$HOME/Library/Python/2.7/bin
powerline-daemon -q
POWERLINE_BASH_CONTINUATION=1
POWERLINE_BASH_SELECT=1
. /Users/cool/Library/Python/2.7/lib/python/site-packages/powerline/bindings/bash/powerline.sh


四、 安装 Powerline 字体

To install Powerline fonts, simply go to https://github.com/powerline/fonts. There you’ll see a whole bunch of folders. Each one is a font, aka “Patched fonts”.

It is called “Patched fonts” because people have taken regular fonts and have added/patched additional Powerline specific icons and fonts to them.

1、下载整个repo 仓库并解压。

(1)Click on the “Clone or download” button and download the whole repo so you try various fonts.
(2)Unzip the fonts-master.zip

字体安装双击 .ttf 文件就行,然后在终端的属性中进行选择。

Let’s open Meslo dotted fonts folder. It will look like below. You’ll see a whole bunch of .ttf file. Each one of them is a font but some are “bold” version of the font, some are “regular” version and so on.

Simply double-click on the .ttf file and press “Install font” to install the font on your computer.

For our case, let’s install “Meslo LG L DZ Regular for Powerline.ttf” and “Meslo LG L DZ Italic for Powerline.ttf”. This will add a regular and an Italic version of the Meslo font.

五、 安装 powerline的gitstatus插件

1、安装 powerline-gitstatus

pip install --user powerline-gitstatus

Note: “– user” command is required to install it in the user’s profile.

2、配置gitstatus 颜色显示

Add powerline-gitstatus color schemes to Powerline
(1)打开 colorschemes/shell/default.json 文件

${powerline-install-directory}/powerline/config_files/colorschemes/shell/default.json
//For example:
/Users/rupa/Library/Python/2.7/lib/python/site-packages/powerline/config_files/colorschemes/shell/default.json

(2) 添加各gitstatus 状态的颜色配置

{
  "groups": {
    "gitstatus":                 { "fg": "gray8",           "bg": "gray2", "attrs": [] },
    "gitstatus_branch":          { "fg": "gray8",           "bg": "gray2", "attrs": [] },
    "gitstatus_branch_clean":    { "fg": "green",           "bg": "gray2", "attrs": [] },
    "gitstatus_branch_dirty":    { "fg": "gray8",           "bg": "gray2", "attrs": [] },
    "gitstatus_branch_detached": { "fg": "mediumpurple",    "bg": "gray2", "attrs": [] },
    "gitstatus_tag":             { "fg": "darkcyan",        "bg": "gray2", "attrs": [] },
    "gitstatus_behind":          { "fg": "gray10",          "bg": "gray2", "attrs": [] },
    "gitstatus_ahead":           { "fg": "gray10",          "bg": "gray2", "attrs": [] },
    "gitstatus_staged":          { "fg": "green",           "bg": "gray2", "attrs": [] },
    "gitstatus_unmerged":        { "fg": "brightred",       "bg": "gray2", "attrs": [] },
    "gitstatus_changed":         { "fg": "mediumorange",    "bg": "gray2", "attrs": [] },
    "gitstatus_untracked":       { "fg": "brightestorange", "bg": "gray2", "attrs": [] },
    "gitstatus_stashed":         { "fg": "darkblue",        "bg": "gray2", "attrs": [] },
    "gitstatus:divider":         { "fg": "gray8",           "bg": "gray2", "attrs": [] }
  }
}

(3)激活gitstatus插件
Open Theme’s default.json file

${powerline-install-directory}/powerline/config_files/themes/shell/default.json
//For example:
/Users/rupa/Library/Python/2.7/lib/python/site-packages/powerline/config_files/themes/shell/default.json

Add the following to the default.json

{
    "function": "powerline_gitstatus.gitstatus",
    "priority": 40
}

(4)重启powerline后台进程
Save the file and run the following: powerline-daemon --replace in the Terminal.

Important Note: Every time you make changes to Powerline’s config, in addition to restarting the Terminal, you’ll also need to restart the daemon to see the changes reflected by running: powerline-daemon —-replace.

(5)重启终端,一切搞定

mac特有软件-Homebrew软件包管理器

一、安装homebrew

  • MacOS comes with Python installed already. Ensure Python’s version is 2.7.x by typing python -V in the Terminal.
  • If it’s not 2.7, install Homebrew that allows us to install various software from the CLI, by running:/usr/bin/ruby -e "$(curl -fsSL https://raw.githubusercontent.com/Homebrew/install/master/install)"
  • Run brew install python to install the latest Python via Homebrew

安装pip

brew install pip
后来出现报错:提示

Error: No available formula with the name "pip" 
Homebrew provides pip via: `brew install python`. However you will then
have two Pythons installed on your Mac, so alternatively you can install
pip via the instructions at:
  https://pip.readthedocs.io/en/stable/installing/
cooldeMacBook-Pro:~ cool$

打开网页:显示操作
curl https://bootstrap.pypa.io/get-pip.py -o get-pip.py
sudo python get-pip.py

二、Homebrew设置代理

homebrew 使用 curl 下载的,所以只要 设置 curl的代理就可以了:

### 新建 .curlrc 文件
cooldeMacBook-Pro:~ cool$ vim  ~/.curlrc
### 编辑 代理内容 并保存退出
socks5 = 127.0.0.1:1086
##  代理内容的地址 其实也可以加上双引号
socks5 = "127.0.0.1:1080"


### 查看代理结果:

liuzhizhi@lzz-rmbp|logs # curl ip.cn
当前 IP:114.110.1.38 来自:北京市 广东恒敦通信技术北京分公司

liuzhizhi@lzz-rmbp|~ # curl cip.cc
IP  : 114.110.1.38
地址  : 中国  北京市
数据二 : 北京市 | 广东恒敦通信技术北京分公司
URL : http://www.cip.cc/114.110.1.38

liuzhizhi@lzz-rmbp|~ # curl myip.ipip.net
当前 IP:114.110.1.38  来自于:中国 北京 北京 联通/电信

三、Homebrew设置镜像源

  • 替换brew.git:
    cd "$(brew --repo)"
    git remote set-url origin https://mirrors.ustc.edu.cn/brew.git
  • 替换homebrew-core.git:
    cd "$(brew --repo)/Library/Taps/homebrew/homebrew-core"
    git remote set-url origin https://mirrors.ustc.edu.cn/homebrew-core.git
  • 替换Homebrew Bottles源:
    就是在/.bashrc或者/.zshrc文件末尾加

    export HOMEBREW_BOTTLE_DOMAIN=https://mirrors.ustc.edu.cn/homebrew-bottles
    

    这两个文件可以自己创建,/.bashrc和/.bash_profile都可以

四、重置源

  • 重置brew.git
    cd "$(brew --repo)"
    git remote set-url origin https://github.com/Homebrew/brew.git
  • 重置homebrew-core:
    cd "$(brew --repo)/Library/Taps/homebrew/homebrew-core"
    git remote set-url origin https://github.com/Homebrew/homebrew-core.git


参考:https://www.jianshu.com/p/005963a4d843

git基础-(2)-历史记录和版本恢复

先再新建一个提交记录,记录数多了,这样方便查询历史记录。

cooldeMacBook-Pro:git-learn cool$ vim a.text
cooldeMacBook-Pro:git-learn cool$ git commit -m "for history" a.text
[master d729d2f] for history
 1 file changed, 1 insertion(+), 1 deletion(-)
cooldeMacBook-Pro:git-learn cool$

一、git log当前游标下历史记录

就是指 如果历史版本有8个,当前游标下恢复成第5个版本,那么git log 显示的记录只能看到 1-5版本,无法显示 之后的 6 -8 版本。

1、git log

cooldeMacBook-Pro:git-learn cool$ git log
commit d729d2f2ca7c2ae0e13d02b6667fb4154d7f3726
Author: test <[email protected]>
Date:   Sun Oct 28 17:44:47 2018 +0800

    for history

commit 4e8507389695dc3061a9dfe101a0325594e8b164
Author: test <[email protected]>
Date:   Sun Oct 28 17:38:23 2018 +0800

    Second commit

commit 7f4008f0e72ad3d47c4cfc7916870fe91ae0ae51
Author: test <[email protected]>
Date:   Sun Oct 28 17:16:09 2018 +0800

    hh

commit b857e6bf3b44bba35c88c77139ae0c0e0cd2b182
Author: test <[email protected]>
Date:   Sun Oct 28 16:52:21 2018 +0800

    first submit a.text
:

=======================================================
【git log 信息下面若是 光标带冒号,按空格键可以翻页】
多屏显示控制方式:
空格向下翻页
b 向上翻页
q 退出

commit d729d2f2ca7c2ae0e13d02b6667fb4154d7f3726  代表 提交hash值

2、git log –pretty=oneline【解决输出日志信息太多问题】

cooldeMacBook-Pro:git-learn cool$ git log --pretty=oneline
d729d2f2ca7c2ae0e13d02b6667fb4154d7f3726 for history
4e8507389695dc3061a9dfe101a0325594e8b164 Second commit
7f4008f0e72ad3d47c4cfc7916870fe91ae0ae51 hh
b857e6bf3b44bba35c88c77139ae0c0e0cd2b182 first submit a.text
cooldeMacBook-Pro:git-learn cool$ 

3、git log –oneline【解决输出日志信息太多问题】

cooldeMacBook-Pro:git-learn cool$ git log --oneline
d729d2f for history
4e85073 Second commit
7f4008f hh
b857e6b first submit a.text
cooldeMacBook-Pro:git-learn cool$ 

二、git reflog 显示项目所有历史记录

cooldeMacBook-Pro:git-learn cool$ git reflog
d729d2f HEAD@{0}: commit: for history
4e85073 HEAD@{1}: commit: Second commit
7f4008f HEAD@{2}: commit: hh
b857e6b HEAD@{3}: commit (initial): first submit a.text
cooldeMacBook-Pro:git-learn cool$ 

HEAD@{移动到当前版本需要多少步}

三、历史版本恢复

1、先根据 git 历史记录 找到游标【head】对应的 hash 局部索引值。

cooldeMacBook-Pro:git-learn cool$ git reflog
d729d2f HEAD@{0}: commit: for history
4e85073 HEAD@{1}: commit: Second commit
7f4008f HEAD@{2}: commit: hh
b857e6b HEAD@{3}: commit (initial): first submit a.text
cooldeMacBook-Pro:git-learn cool$ 

HEAD@{移动到当前版本需要多少步}

2、选择历史版本进行恢复

(1)git reset --hard [局部索引值]

cooldeMacBook-Pro:git-learn cool$ git reset --hard 7f4008f
HEAD is now at 7f4008f hh

(2)或者使用^符号:只能后退
git reset --hard HEAD^
注:在当前游标下,一个^表示后退一步,n个^表示后退n步

(3)或者使用~符号:只能后退
git reset --hard HEAD~n
注:表示 当前游标下 后退n 步

四、恢复到上一次提交记录

控制台直接输入: git reset --hard 就可以恢复到最近的一次提交记录。

cooldeMacBook-Pro:git-learn cool$ vim a.text
cooldeMacBook-Pro:git-learn cool$ git status
On branch master
Changes not staged for commit:
  (use "git add <file>..." to update what will be committed)
  (use "git checkout -- <file>..." to discard changes in working directory)

	modified:   a.text

no changes added to commit (use "git add" and/or "git commit -a")
cooldeMacBook-Pro:git-learn cool$ git reset --hard
HEAD is now at 7f4008f hh
cooldeMacBook-Pro:git-learn cool$ git status
On branch master
nothing to commit, working directory clean
cooldeMacBook-Pro:git-learn cool$

一开始 工作区 、暂存区 和本地仓库 都是相同的,后来修改了a.text。然后用git status 查看,说可以去提交了。这个时候,输入git reset --hard 发现工作区和暂存区和本地仓库,都恢复到了最近的一次提交记录上去了。工作区中的a.text 的修改信息已被删除,文件已经还原到最近一次的提交记录。

同理git reset --soft  其实没有效果,git reset --mixed 其实就是移除了那些之前添加到暂存区的文件。

五、git reset --soft|mixed|hard

  • –soft 参数
    • 仅仅在本地库移动 HEAD 指针
  • –mixed 参数
    • 在本地库移动 HEAD 指针
    • 重置暂存区【暂存区官方文档也叫 index file】
  • –hard 参数
    • 在本地库移动 HEAD 指针
    • 重置暂存区【暂存区官方文档也叫 index file】
    • 重置工作区

六、删除文件找回

git 的文件删除操作,也要提交记录到本地仓库,这样才能算真正记录了文件删除。

1、新在工作区中将之前提交过的文件进行删除

cooldeMacBook-Pro:git-learn cool$ git status
On branch master
nothing to commit, working tree clean
cooldeMacBook-Pro:git-learn cool$ ls
a.text	bbb.txt
cooldeMacBook-Pro:git-learn cool$ rm bbb.txt
cooldeMacBook-Pro:git-learn cool$ git status
On branch master
Changes not staged for commit:
  (use "git add/rm <file>..." to update what will be committed)
  (use "git checkout -- <file>..." to discard changes in working directory)

	deleted:    bbb.txt

no changes added to commit (use "git add" and/or "git commit -a")
cooldeMacBook-Pro:git-learn cool$ 

===================================

新建了两个文件,然后将两个文件都提交到了本地仓库。
接着其中删了一个,查看git status发现有文件删除,需要提交记录到暂存区或者直接提交到本地仓库

2、接下来将删除文件记录添加到暂存区:

cooldeMacBook-Pro:git-learn cool$ git add bbb.txt
cooldeMacBook-Pro:git-learn cool$ git status
On branch master
Changes to be committed:
  (use "git reset HEAD <file>..." to unstage)

	deleted:    bbb.txt

cooldeMacBook-Pro:git-learn cool$ 

========================================
将 bbb.txt 的删除记录 添加到了 暂存区,并显示 git status 状态

3、最后将删除文件记录提交到 本地仓库:

cooldeMacBook-Pro:git-learn cool$ git commit -m "bbb.txt has been deleted" bbb.txt
[master 7719e56] bbb.txt has been deleted
 1 file changed, 2 deletions(-)
 delete mode 100644 bbb.txt
cooldeMacBook-Pro:git-learn cool$ git status
On branch master
nothing to commit, working tree clean
cooldeMacBook-Pro:git-learn cool$ ls
a.text
cooldeMacBook-Pro:git-learn cool$ 

恢复已删除文件的前提:删除前,文件存在时的状态已提交到了本地库。

操作:git reset –hard [指针位置]
①删除操作已经提交到本地库:指针位置指向历史记录
git reset --hard [八位hash值,比如:7f4008f]
②删除操作尚未提交到本地库:指针位置使用HEAD
git reset --hard head 或者可以直接输入  git reset --hard